5 Helpful Links for Creating Comic Panels
- At August 17, 2011
- By Laur
- In tips
 0
0
I was part of a Deviantart comic group that opened up a suggestion box to Ask the Mods when I noticed artists were asking for tips on how to make manga panels. Eager to help, I immediately wanted to reply with something but found it was difficult to boil down everything I felt needed to be included. Reflecting on my own learning process, I wasn’t even sure I knew what made my own panels ‘good’ or ‘good enough.’ So like everything you’ll probably read on this blog, these posts are somewhat selfish in nature, as they also serve to remind me of the important stuff that go into creating comics.
Elements of Good Composition
If you think about what creating comic panels really are, it’s the art of arranging boxes on a page. Manga is particularly known for its diverse and bombastic arrangements. But first and foremost, nothing beats knowing the most basic of design elements: composition. Fortunately, the Temple of Seven Golden Camels (a fantastic resource blog for story board and layout artists) has two short reference links on this: Composition 101 and Composition 102. You just can’t go wrong brushing up on foundational stuff.
Panelling and Pacing
Lilrivkah’s post regarding the pages of her OEL manga Steady Beat is quite informative as she analyzes how creating her panels informs the pacing of her story. On this note, I think it’s really important for manga/comic artists to actually “study” how the comics they read and appreciate actually work for that particular genre. For instance, the elements of a shojo manga like Fruits Basket won’t necessarily work for a seinen comic like Naoki Urasawa’s Monster. The two are very different stories and therefore, employ different kinds of pacing, layout and panels. I find that I go back and forth between more open layouts and strict grid-like formations because I want to make the panel arrangements serve the purpose of my scenes.
Disney Comic Artist’s Kit
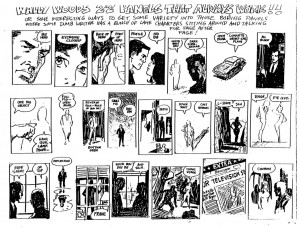
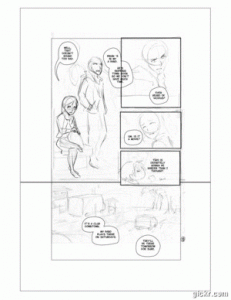
Carson Van Osten’s helpful handout illustrates some recurring problems with staging and perspective within panels and also shows how to resolve them. I’m personally ecstatic to have come across this because even if superficially, it has nothing to do with manga, it has everything to do with depicting characters in believable environments – a most difficult task for beginning comic artists everywhere. Wally Wood’s 22 Panels That Work handout (pictured above) is a nice little reminder of the different ways you can stage panels in Western comics and also helps fuel more interesting compositions.
Feedback from a Manga Editor
SASAKI Hisashi (former Editor in Chief of Weekly SHONEN JUMP – where Naruto, Bleach and One Piece are all serialized) recently gave some insightful feedback to young American mangaka at Comic-con last month. He also shares a lot of beginning artist problems which are worth keeping in mind. It’s no question getting feedback is an important step in growing artists’ process and whether it’s from someone as high up the ladder as Hisashi-san or your own best friend, I think you can always learn a thing or two from the people who read your work.
Manga-Apps Template Page Layouts
Finally, for manga artists totally in the dark about composing their own panels, here’s a Deviantart resource group filled with Template Page Layouts. The risk of using cookie-cutter boxes is ofcourse you may not learn the right way to do things from the ground up but learning is very personal journey for everyone. What works for me may not be the same for you and I’ve always felt you still learn something just by the sheer act of DOING IT. So if you just want to make comics, go MAKE COMICS!
What are some other tips, posts, and sites about comic panels you recommend? Feel free to sound off below!
How to Make Manga – Plan your Story
- At July 29, 2011
- By Laur
- In blog, processes
 0
0
I was in line for the Gallery Nucleus‘ Harry Potter Tribute Exhibition opening night the other weekend with some friends and by 9 PM, gave up on the idea I would make it to any of their advertised events. Seriously, it was like a Hall H line around the block and through the parking lot! I wasn’t too bitter though (I had a yummy dinner at Noodle World nearby) and was delighted so many people and their kids showed up and wanted to be part of the celebration.
Before I left, in the course of our conversation my friend asked me, “Wouldn’t it be great to create something this culturally relevant?”
I’m sure everyone reading this would answer a resounding, “YES! Ofcourse!” (and if you deny it, I think you’re probably not being honest with yourself XD). Everyone wants their beloved stories and creations to be appreciated. The especially fortunate few like JK Rowling have innumerable fans who not only love her books, but also everything that has to do with the world she created. They expand her established world by creating their own kinds of art (fanfics, fanart, costumes) and form communities that share their love for her stories.
I’ve always felt much respect and admiration for the storytellers whose works inspire such devotion and creative frenzy. Joss Whedon’s works (Buffy the Vampire Slayer, Angel, Firefly) and LOST, are a few more of my favorite stories with similar kinds of following. On the manga side, Hiromu Arakawa’s stellar work with Fullmetal Alchemist makes me weak in the knees and Naoki Urasawa’s handling of Pluto was very emotional.
It is somewhat intimidating to start off loving these phenomenal blockbusters and then, to ask yourself “What do I do to create something like that?” but I’m getting to the point of this post and it’s this: At the heart of each of these successful dramatic stories are characters. You may love the Harry’s wizarding world or enjoy deconstructing the Island’s mysteries but you tuned in and you stayed for the characters.
Creating compelling, sympathetic and memorable characters and giving them rich, believable and interesting stories is no easy feat. It takes time, lots of work and patience. In today’s fast-paced world, those are becoming rarities.
I’m discovering this gradual, fairly maddening process myself as I work on even more drafts for my story. As I suffer my way through rewrites this week, I take a lot of comfort in the fact that apparently, JK Rowling spent over five years planning Harry Potter’s story before she even started writing her first book. It makes me believe in the writing process and helps me be patient as I try to usher my story to be the best it can be.
Yes, my stories may never even be a fraction of the ginormous successes like Rowling’s or Whedon’s but if I plan it right, and respect the processes these creators share, no one can say I didn’t give it my best shot.
Some links I just wanted to share this week:
What if Harry Potter were an anime – a technically stunning anime illustration featuring Harry Potter characters by this PIXIV artist.
Another one equally as impressive is this Harry Potter collaborative piece by Rem and Maximo Lorenzo.
Evan Dahm wrote a tumblr post on how webcomics need to get better.
A post comparing Harry Potter, Tohru Honda and their respective villains. Fun read!
And finally, a must-read post on a now infamous SDCC panel and the questions about female DC creators/characters. Over at Comics Alliance, Laura Hudson’s response is equally fascinating and well-written.
How to Make Manga – Final Track Manga Process
- At July 27, 2011
- By Laur
- In processes
 1
1

Decided to compile a masterlist of the posts regarding my Final Track process. Hope you’ll find this useful!
This was a series of posts I wrote about how I made Final Track, a 34-page shojo manga I submitted for the Yen Press New Talent Search Fall 2010. I was contacted as a finalist in March 2011 and was given valuable feedback by the editors.
Part 2: Writing and Thumbnails
Comicking Part 5: Manga Studio and Etc.
- At April 11, 2011
- By Laur
- In blog, processes
 5
5
This is Part 5 of a series of posts I’m writing about how I made Final Track, a 34-page shojo manga I worked on as my submission for the Yen Press New Talent Search.
I usually ink all the pages completely before scanning everything. I know some people like completing one page at a time and that’s fine. We all have different preferences. I scanned these pages in at 600dpi even though 300dpi is the usual standard for printing. Unless your computer can handle the file size, I’d say 300 is fine. I save them as Bitmap files (.BMPs) and import them in Manga Studio.
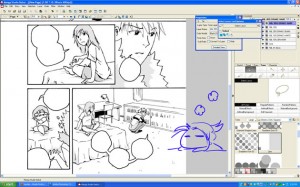
Using Manga Studio seems to have been fairly intuitive enough that I managed to plow my way through after looking up processes and figuring out what commands did what. Suffice it to say that I’m much happier with the results from Manga Studio than trying to tone in Photoshop. The database of built-in tones by itself was a lifesaver and the ability to use gradient tones made achieving certain effects efficiently.
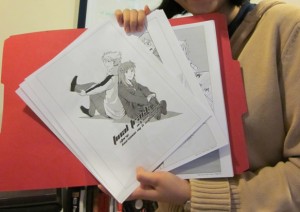
If you’re doing a comic specifically for print, it’s important that you actually see what it looks like on physical paper. You’re likely to discover things that jump out at you very differently from viewing on a screen. I’m always fortunate to have a very patient and detail-oriented sister willing to go over my work with a fine-toothed comb and point out areas for improvement. Afterwards, ofcourse, the next step involves implementing the feedback. It’s only after I’ve gone over everything again did I feel like the work was polished enough for presentation. It’s important to put your best foot forward.
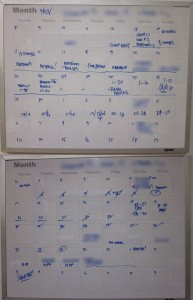
If the process seems unwieldy and time-consuming, it really is and it will totally be your advantage to give yourself concrete and achievable deadlines. This will allow you to keep track of your progress and make adjustments to your schedule as needed. Final Track was a project I undertook for 2 months with full-time work. I did take a week off on Thanksgiving but the rest of the time, I spent working on it weeknights and weekends. I gave myself plenty of breaks so not to strain my body, ate well and slept regularly. No last minute rush jobs here because I hate doing that. Some people might be able to produce their best work under extreme pressure but I know I can’t. I’ve never been prone to pulling all-nighters because I just can’t recover from sleep debt as graciously as others can. So, I rely on strategies and planning ahead to make sure the work gets done.
Well, there you have it! This wraps up my behind-the-scenes look at Final Track and my comicking process. Hope y’all enjoyed!
Questions? Comments?
Previous Post: Comicking Part 4: Pencils, Bubbles & Inks
Comicking Part 2: Writing and Thumbnails
- At March 01, 2011
- By Laur
- In blog, processes
 5
5
This is Part 2 of a series of posts I’m writing about how I made Final Track, a 34-page shojo manga I worked on as my submission for the Yen Press New Talent Search.
Now that you’ve got some ideas, it’s time to choose one and focus on crafting it. I’m going to be honest with you and admit this is the most difficult part of the process for me. You’ve really got to be patient during this process because if you care about creating an interesting, meaningful story, it comes with a price: dedication, perseverance and time.
Ever since I was introduced to the craft of screenwriting (writing for TV and movies) by my writing partner (@nathango), I started paying more attention to elements of stories I previously used to gloss over. I started running into terms like character motivations, conflicts and resolutions and felt like I was learning vital notions I could use in creating comics. I’m sure there are plenty of great books for how to write comics, too, but I’ve been in love with movies longer than I’ve been reading comics so it was just a matter of preference.
It certainly helps to have someone with you through the brainstorming period in which your story takes shape. I’ve worked with Nathan, my co-writer on Final Track, on projects before and I know we care enough about creating a good story that we can get into lengthy debates over important things. We talk about characters first and what their journey will be like. Then, one of us makes a rough outline of how we think things will go. Once we get to this stage, I take over and make my first pass at dialogue.
Scripting
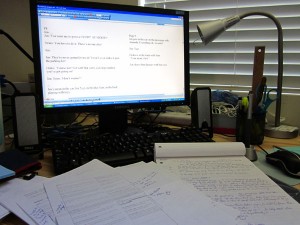
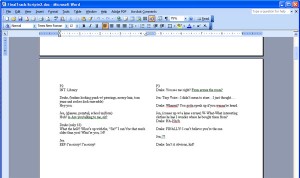
When I script, I just use MS Word and change the layout orientation to landscape and create two columns per page. Recently, I’ve also tried just having the page view showing 2 pages simultaneously. The Insert>PageBreak function is especially useful when I want to write for a new page. I do this to get a feel for where the page I’m writing falls: right or left. (In this case, my assumption is based on a printed comic book layout.) That way I can plan important scenes like surprises on a left page so you don’t see it coming until you turn the page. I also have an easier time figuring out where I can insert a double page spread to make sure it actually takes up facing pages.
If I have a page count limit, I find it helpful to break the story into chunks and determine how many pages each chunk should take up. If you know about act breaks, you can break your story into however many acts you want (for example, the typical number of acts are 3 for a movie — this is easy to understand: beginning, middle and end). This way, you know what scenes should be extended or cut depending on page availability.
I have a lot of fun with dialogue and enjoy writing for comedy. It’s when I script and play with the characters’ voices in my head that I see the comic come to life. But sometimes, I can get carried away with ideas. So getting feedback as early as this part in the process helps me avoid making painful changes down the road when things are harder to edit. Having a working script doesn’t make things final anyway. Often, I create thumbnails alongside the script especially if I want to see how scenes break down on a page. This helps me include visual notes that I don’t have to write out on the script.
Thumbnailing
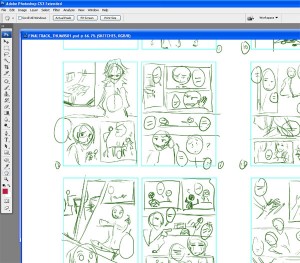
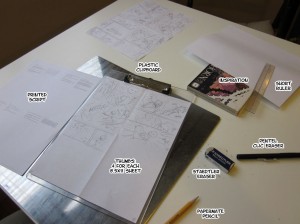
With thumbs, I’ve been wavering back and forth with drawing them on paper and using a tablet on Photoshop. Thumbs don’t really need to be polished which is why I can do them on scrap pieces of paper. But when I’m moving scenes around different pages, having the option of cutting and pasting panels and sequences onto new pages frees me up creatively so I don’t have to erase and redraw anything. I can concentrate on the flow of the story.
Flow is really what I pay attention to when I’m working on thumbs. Does it make sense? Are the elements on the page properly guiding the reader? What are the most important aspects I want to highlight in the scene? All of these are questions I ask when drawing the stick figures in the boxes because I want to control the experience of the viewer and make them see what I want them to show them. If you don’t understand what’s going on in a panel of a comic page, it’s likely the result of poor composition choices.
Questions? Suggestions? I’d love to hear from you!
Previous Post: Comicking Part 1: Ideas
Next Post: Comicking Part 3: Character Designs

